Best MySQL GUI clients
The best MySQL GUI client is the one that does all or most of the tasks much easier and faster than by any other method. But the selection of tasks varies from person to person, whether one is an administrator, a developer or both.
In this article we’re going to look at the optimal mix for both types of usage and highlight ones that are more suitable for MySQL administration and database development.
The best MySQL GUI clients in ranking order NavicatThe best ...
View Progress Of MySQL Dump Restore Or Import

Ever wondered why the MySQL command line tool don’t have any sort of progress bar or information or status update? Well, you’re not alone if you do. Especially importing a GB sized dump file can take a long time, especially if the table engine was InnoDB.
There are some clever utilities which can be used to accomplish just that, by giving the user simple, yet useful information about the progress of their process. Let’s look at how to show progress of ...
Cross deleting records from multiple tables in mysql

I’ve been asked many times how to do a MySQL join delete, that is delete records in multiple tables joined in MySQL. Here are three of methods that should get anyone started.
As always, create a backup before updating or deleting records.
Simple Inner Join Delete MethodThe simple inner join method uses commas with an implicit inner join like in the example below. Here we’re using an items and price table, where each table has an itemId field which is what we ...
MySQL NOLOCK syntax

MySQL NOLOCK syntax is equivalent to WITH (NOLOCK) in SQL Sever, and it is a transaction isolation level that defines how data is available during an update. With other words, it is a property that defines at what point changes made by an update operation will become available in a row, table or database to requesting processes.
This is equally important to a DBA as it is to a developer, as both need to be aware of the potentially outdated data returned ...
Install CouchDB & use with JSON and Map-Reduce

CouchDB is another offspring from the open-source, NoSQL, non-relational databases and is maintained under the Apache Foundation. It differs itself form the likes of MongoDB or Cassandra in many ways, except they all store data in so called “documents” that are in JSON format. Utilizing this format allows for data structures which can be hashes, lists, nested arrays and of course scalar values.
This added complexity results in more powerful features, mainly to have a db that is not just a ...
How to find duplicate rows in MySQL database table
I’ve been asked the question “How can I return duplicate rows only from a MySQL db table” many times, so I’ve decided to post a writeup here in a short article. After all, it seems such a common requirement. Any DBA undoubtedly has come across the need to find duplicates in a table.
If you’re really concerned about duplicate rows, or even more profound, if you’re code logic depends on unique entries in a mysql table, you really should implement a ...
MySQL – How To Analyze, Repair and Optimize all Tables

Whether you’re a DBA or just host your own blog, database maintenance is a task you’ll have to perform sooner or later. Either the website gets slow, data becomes corrupt or worse, the server crashes, having a few commands handy will be golden. So how do we perform a mysql repair and optimize all databases?
Many MySQL GUI clients allow for analyze, repair and optimize functions, but they usually are limited to one table at a time, or to a maximum ...
How to install Apache PHP and MySQL on a Mac
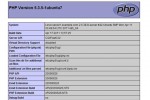
The following instructions guide you thru the installation of the latest LAMP Stack (Apache, PHP and MySQL) on MacOS X Snow Leopard.
Sure, there are pre-packaged solutions like MAMP and MAMP Pro, but if you want to know the inner workings of a LAMP stack, you want to do the installation and configuration yourself.
Let’s get started. Here are the steps to install Apache, MySQL and PHP on a Mac OS X
Download the installation image from MySQL website here. Then double-click to ...MySQL Replication setup the easy way
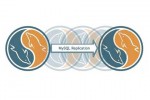
The MySQL replication setup requires three basic steps, we need to setup the master, then setup the client and finally start the replication process.
1. Configure MySQL MasterWe will need to modify a file called my.cnf, which is the main configuration file for mysql. On most systems it’s located in /etc/ or /etc/mysql/ and it contains all important configuration data.
First, let’s ensure that networking is enabled and mysql listens on all, or at least the client’s IP addresses. We also have ...
Nginx and memcached module

Memcache is traditionally used as a module inside server side scripts, such as PHP, ASP, ColdFusion and others. And it’s doing a terrific job, as long as it’s implemented correctly.
But if we look under the hood of the actual Memcache application, and I’m not talking about the PHP or ASP extension, but rather the executable that’s running as a daemon under Linux, it is a rather simple, database like application running in memory. Now there are two basic actions that ...